The leap to dynamic pricing can feel intimidating, but we’re here to show you that using DPGO is as easy as pie and by far the best decision you can make for your short-term rental business.
If you’re not using the right pricing tool, turning on dynamic pricing can sometimes feel like you’re giving away control of your listing, but nothing could be further from the truth when you’re using DPGO. We designed DPGO as an optimization tool. We work for you to make your property listing the most profitable it can be.
Our pricing tool is incredibly detailed. We want our users to feel 100% in control of their listing. We can’t automate your pricing without you first setting up the ins and outs of your pricing strategy. Of course, we will help you decide on a pricing strategy, but we need some information from you first. These input values that we ask you to specify give us a pricing framework within which to work.
We know that it can seem scary, but that is what this guide is for – to show you that you are in control of your listing at every stage of the dynamic pricing process. Nothing happens to your prices without you completing the set-up process first. DPGO is a tool for business optimization, not business hijacking.
With that said, let’s dive straight into the DPGO registration process.
How Do I Register for DPGO?
Step One: Go to Our Website
Visit www.dpgo.com and click the blue “SIGN UP FOR FREE” button in the top right-hand corner. If you clicked on a Registration link from one of our social media posts, blog posts, or emails, you’ll be taken straight to the registration page.
Step Two: Enter Your Details
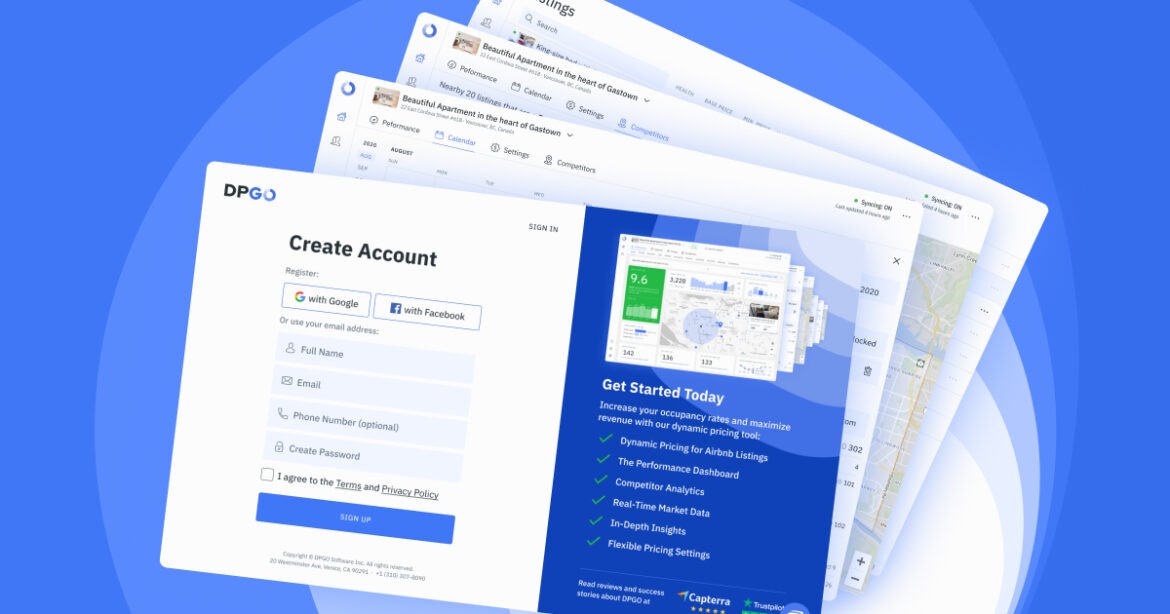
Enter your personal details, agree to the Terms and Privacy Policy, and click “SIGN UP”. Or, if you prefer, you can register with your Google or Facebook account.
Step Three: Connect Your Airbnb Account
After you click “SIGN UP”, you’ll be taken to the Connect to Airbnb page. Here, you’ll need to enter your Airbnb login details and allow DPGO to import your property listing specifics. DPGO needs access to these details to create our dynamic pricing recommendations.
We gain access to Airbnb in read-only mode, and we never store your security-sensitive information like passwords. We are only permitted to make certain Airbnb-authorized changes, like updating your minimum stay requirements. If you have more questions about how DPGO accesses your Airbnb account, please feel free to reach out to our support team and they will answer any questions that you might have! You can reach them at support@dpgo.com.
Please Note: If you do not have a unique password for Airbnb because you signed up for Airbnb with Facebook or Gmail, you will first need to create an individual password for your Airbnb account. You cannot connect to DPGO without having a password specifically for your Airbnb account. Click here to visit the Airbnb help page.
Step Four: Airbnb Approval
As you’re granting DPGO, a third party, access to your account, Airbnb may need to verify your identity for safety reasons. This discretionary step ensures that you’re kept secure and that Airbnb will allow your connection with DPGO to go ahead. Depending on your account, Airbnb may send you a verification code (either by email or text, depending on which you select) and all you need to do is enter the code that Airbnb sends you, and the connection can get started!
Step Five: Wait for Connection
DPGO will then establish a connection with your Airbnb account. Please be patient and do not close your connection window. If you run into any issues, please feel free to send an email to support@dpgo.com and we’ll be on hand to help!
It doesn’t take long for DPGO to connect with your Airbnb account but it’s important that you stay on the page and do not refresh your browser window.
Please Note: You may also receive an email from Airbnb alerting you to a new sign-in session. This is totally normal and nothing at all to worry about. Please do not change your Airbnb password. If you do, your connection with DPGO will expire and you will have to go through the set-up process once again.
Step Six: Set-Up Completed!
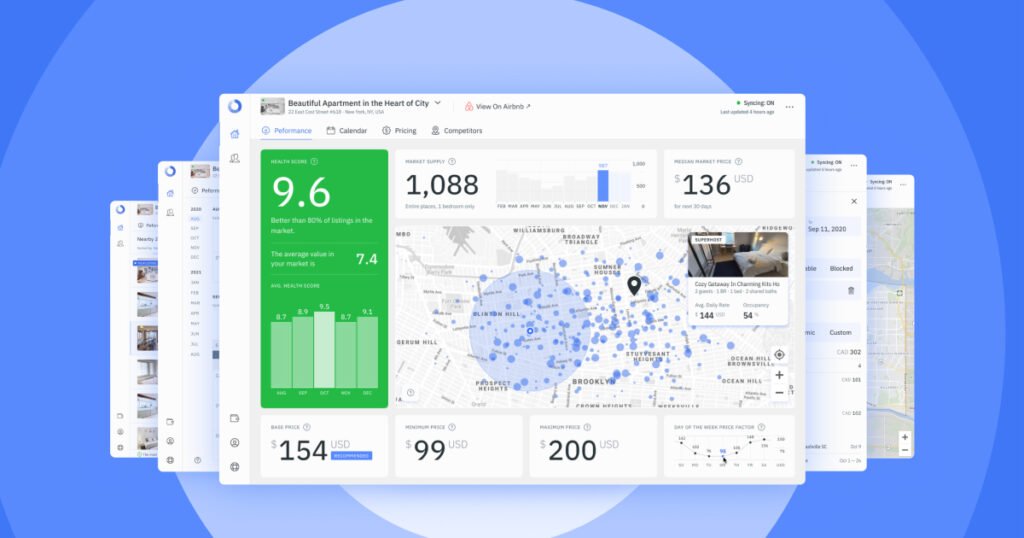
Now your Airbnb account is connected to DPGO, you’ll be presented with our recommendations for your dynamic pricing strategy.
In the next section, we’ll walk you through every settings tab and show you how to make the most out of DPGO!
How Do I Make Changes to My Dynamic Pricing Settings?
Price Settings
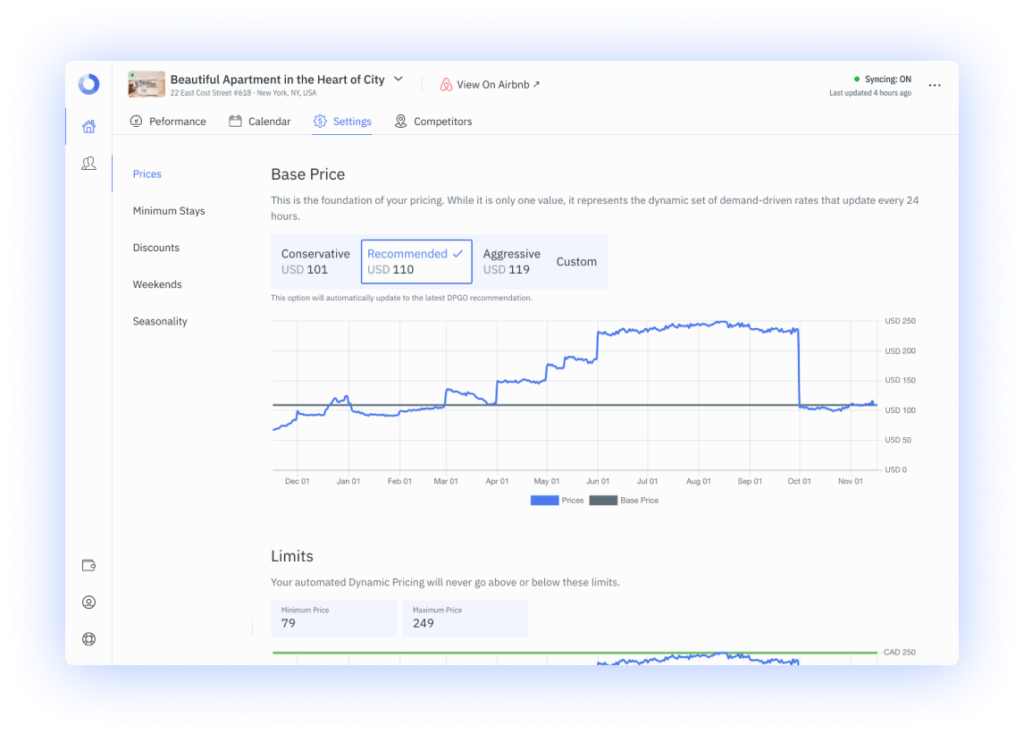
The “Prices” subheading menu allows users to enter their desired Base Price, plus a figure for maximum and minimum pricing limits. The vast majority of our users opt to enter both a Base Price and a minimum price, but not a maximum price.
Your Base Price forms the foundation of your pricing strategy. We give you four options: you can choose one from our three recommendations (Conservative, Recommended, or Aggressive), or you can enter your own number for a ‘Custom’ strategy.
The ‘Conservative’ strategy is aimed at keeping your occupancy at a steady and reliable rate. The ‘Aggressive’ strategy is designed to get you as much revenue as possible. The ‘Recommended’ strategy is a balance of the two.
Setting a minimum price ensures that our pricing engine never sets your rates lower than that number. This figure should cover your costs and include a buffer, which you can decide for yourself. We do not offer recommendations for either minimum or maximum prices. When you add a minimum price, we would recommend watching the average nightly rate for your area. If your minimum rate exceeds the average, there is a possibility that your listings won’t get the same exposure on Airbnb and this will result in a lower occupancy rate.
Minimum Stays
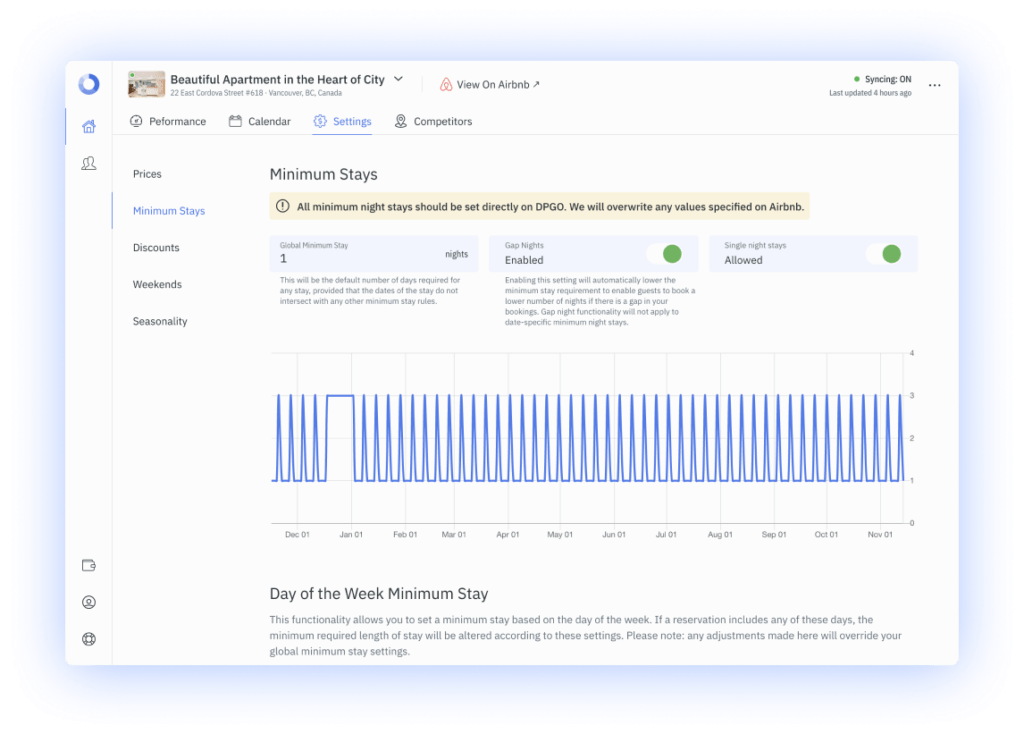
Having a strategy for minimum stays can make the difference between a profitable Airbnb listing and one that costs more than it makes. Accepting single-night bookings means higher cleaning costs, and quite frankly, more work.
The Minimum Stay menu tab allows you to enter a global minimum night stay requirement and allows you to select whether or not you want to allow gap night stays. The Gap Night function works only for those gaps in your calendar that cannot be sold as one booking because of the minimum night stay requirements. In this case, the algorithm reduces the requirements for the gap to be sold as a complete package. If you do not want to allow single-night stays, simply disable this setting.
We wanted our users to experience the pinnacle in Airbnb management technology, so we designed a range of features including our day-of-the-week minimum stay capabilities. This menu allows you to set minimum stay requirements according to the day of the week on which the booking starts. Most of our users opt to set higher minimum night stays for weekends. Often our users set their weekends to have a 2-night minimum in order to ensure their entire weekend is booked.
You can also set date-specific and time-sensitive requirements in regards to the length of stay. The time-sensitive minimum stay settings allow you to create rules to automatically adjust the minimum stay requirements based on the number of days that will elapse between the booking date and check-in. Date-based minimum night stays allow you to manage different requirements across different periods. For example, most hosts opt to set a higher minimum night stay requirement over Christmas and New Year, or during school holidays.
Discounts
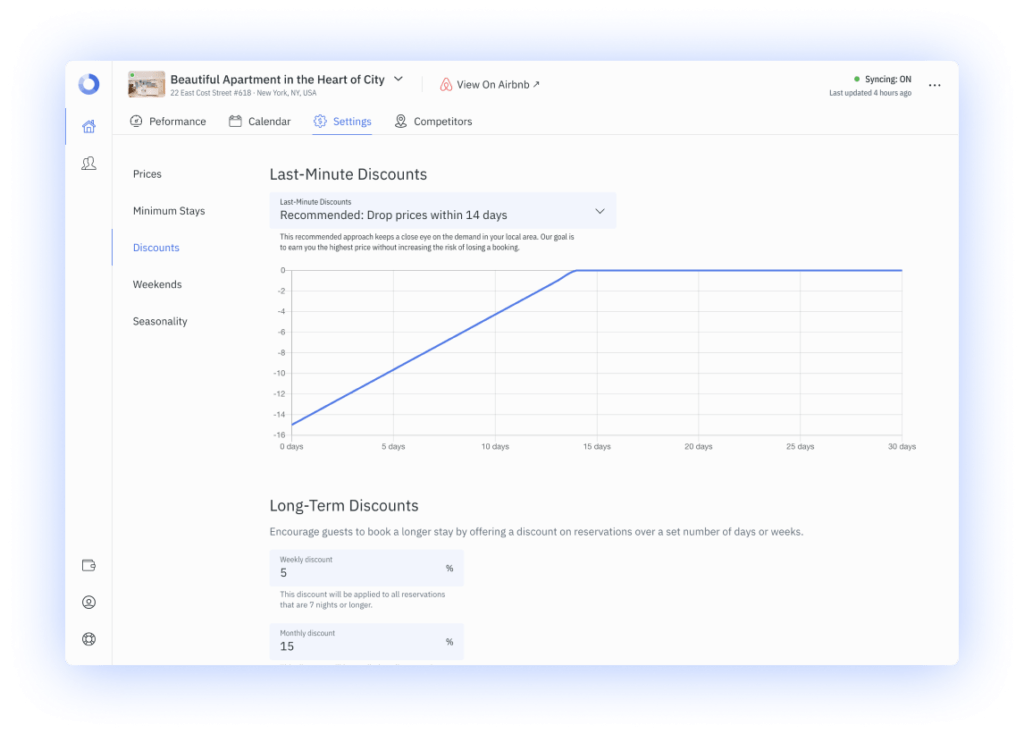
On our Discounts tab, users can set both last-minute and long-term discounts. For last-minute discounts, we offer the standard four DPGO strategies: Conservative, Aggressive, Custom, and Recommended. If you select ‘Custom’, you can enter the percentage discount that you’d like to offer. You will also need to enter the number of days before check-in that the discount will be valid.
We see plenty of variation in these numbers, but if you’re not very familiar with offering discounts, try the ‘Recommended’ strategy and review your listing’s performance after a month or so.
We’ve divided long-term discounts into sections: weekly, monthly, and custom. With DPGO, you can decide on the percentage discount that you’d like to offer for bookings over 7 and 28 days. You can also set custom discounts for custom lengths of time. Make sure you review their effectiveness after a month and make some changes if you’re not happy with the performance.
Weekends
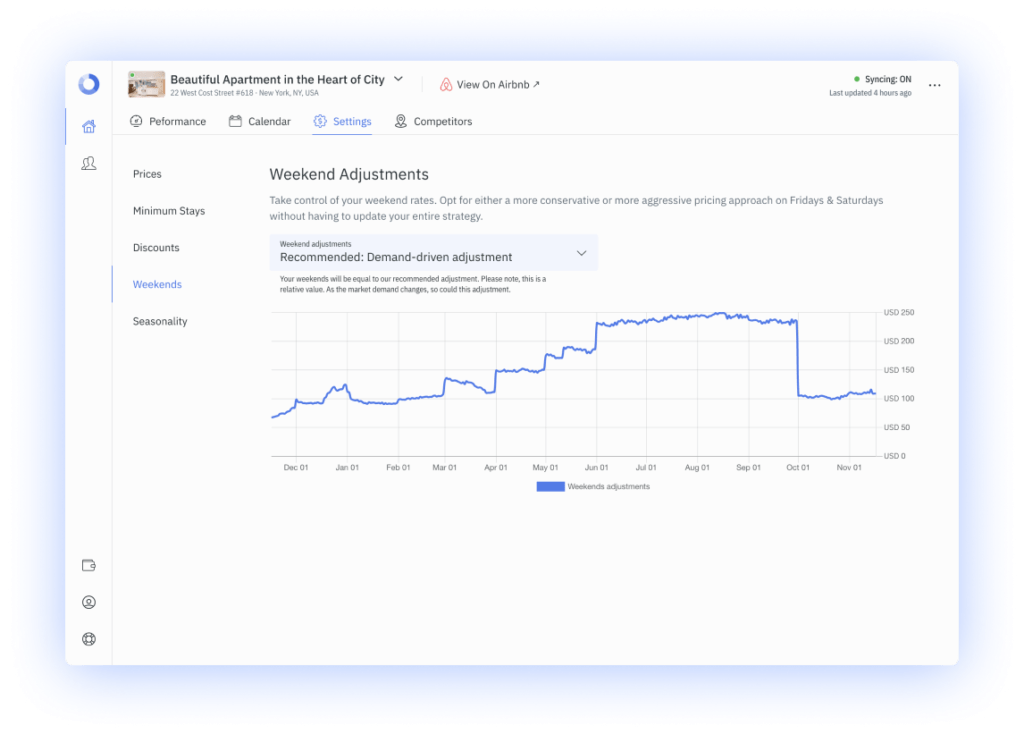
We thought long and hard about how we can streamline our user’s weekend pricing strategies. Friday, Saturday, and Sunday are critical opportunities to increase your Airbnb profitability.
Again, you can choose from our four strategies: Conservative, Aggressive, Custom, and Recommended. If you chose ‘Custom’, you’ll be able to input your own percentage increase for weekend bookings. Please note that your ‘Custom’ percentage is not static. If the recommended percentage shifts, your custom percentage will change too.
Seasonality
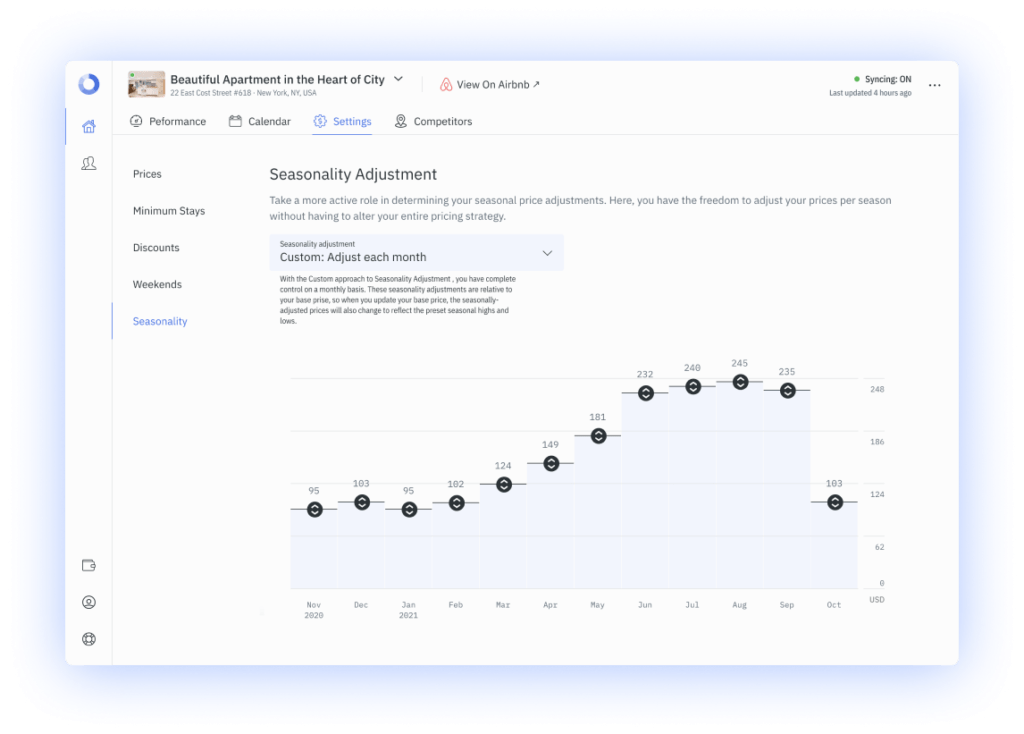
Short-term rentals, no matter where in the world they are located, have peak and off-peak business seasons. Our ‘Seasonality’ settings allow our users to adjust their pricing strategies according to the month of the year.
Our recommendations are based on historical booking trends in your area as well as data-driven forecasts for what we think the market will do during your next peak season. We’re sure you’ve come to realize by now that we will always allow you to input your own values and design your own strategy when we can. And our ‘Seasonality’ settings are no exception.
Users are also able to manually alter their monthly seasonal adjustments with our helpful monthly slider menu. These seasonal adjustments are relative to your Base Price, so if you update your Base Price, your seasonal adjustments will also change.
Set Your Property Nickname
For ease of reference, we recommend using our nickname function to help track your listings more efficiently than ever!
Congratulations, You’re Done!
While you’re here, why not have a read of a few more of our posts? We recently developed a 6 Ways to Success guide for Airbnb hosts. Ever wondered if Airbnb Plus or being a Superhost helps with business? We found out…



1 Comment
Pingback: How Dynamic Pricing Can Improve Your Small Retail Business - iCharts